Skip to content
Menu
Practical Sustainability Practical Sustainability
  • About Us
  • Animals
    • Goats
    • Pigs
    • Poultry
    • Rabbits
    • Vermiculture
      • Black soldier fly larvae
      • Earth Worms
      • Meal Worms
  • Bathroom
    • Compost Toilets
  • Building
    • Building with bottles
    • Clay or Mud bricks
    • Earthships
    • Timbercrete
    • Underground Living
    • Used Tires
  • Energy
    • Human energy
    • Hydroelectricity
      • Dammed Hydro
      • Run of the river
      • Tidal
    • Wind
  • Energy Storage
    • Compressed Air Energy Storage
    • Electrical
    • Gravity
    • Hydrogen
    • Kinetic
  • Food Storage
    • Bottling / Canning
    • Dehydration
    • Jam making
    • Pickling & Salting
    • Refrigeration
  • Growing
    • Hugelkultur
    • Mushrooms
  • Heating
    • Solar Air Heating
    • Solar Water Heating
    • With Compost
  • Water
    • Collection
      • Condensers
      • Fog Fences
    • Filters
      • Pre-filters
      • Slow sand filters
    • Storage
      • Barrels & IBCs
      • Rainwater Tanks
      • Swales
      • Underground Skeletons
  • Our Projects
Practical Sustainability Practical Sustainability

DIY basics tips

Posted on January 21, 2017May 11, 2019 by Christopher Pickering

This article covers common DIY basics, so I don’t have to explain them in every tutorial! If you have questions about any steps shown in any tutorial on this site, leave a comment so I can explain further.

Getting things square.

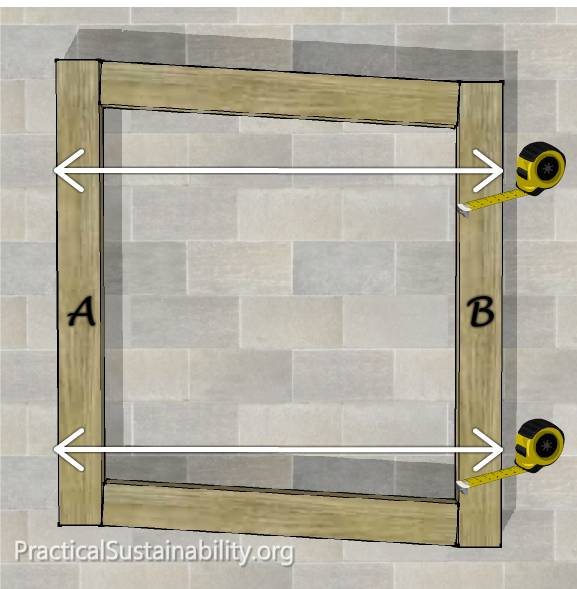
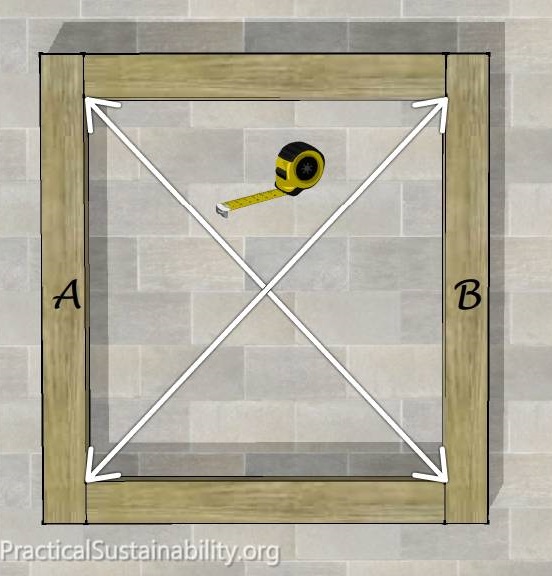
Don’t own a large builders square? You’ll need to square up your timber using a measuring tape.

Method 1 – squaring a frame.
Measure between A and B at the top and bottom. Jiggle them around until the measurements are equal. A and B are now parallel!
Step 1: Measure between A and B at the top and bottom. Jiggle them around until the measurements are equal. A and B are now parallel!
Step 2: Measure diagonally both ways, as shown. Move ‘B’ up or down, until your diagonal measurements are equal. Even if you timbers are not cut perfectly to length, this will get them as close to square as humanly possible.
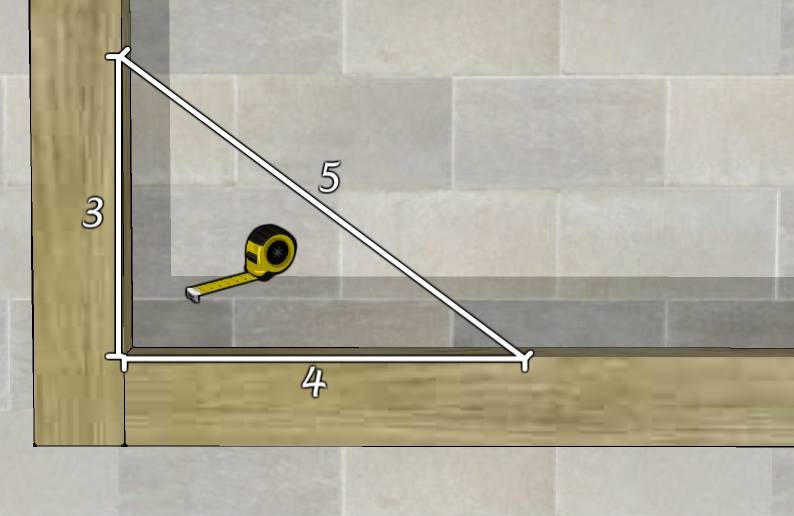
Method 2 – squaring A corner.

You can easily use mathematics to get something square! Pythagorean theorem tells us that in a right angled triangle,  A² + B² = C².

By marking a line on one timber at 3, and on the other at 4 – measured out from the corner – you can wiggle your timbers around until the diagonal measurement equals 5. Your joint is now square!

It's best to make your imaginary triangle as big as possible, to help you be more accurate.
It’s best to make your imaginary triangle as big as possible, to help you be more accurate. Simply pick a number and multiply the 3, 4 and 5 by it to make the triangle larger. Eg. 30,40,50. or 45, 60, 75. Etc.

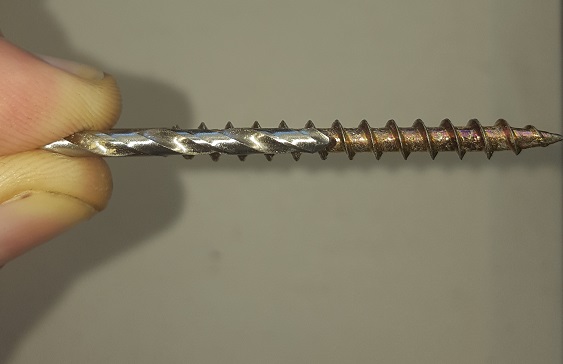
“Lengthen” your screws.

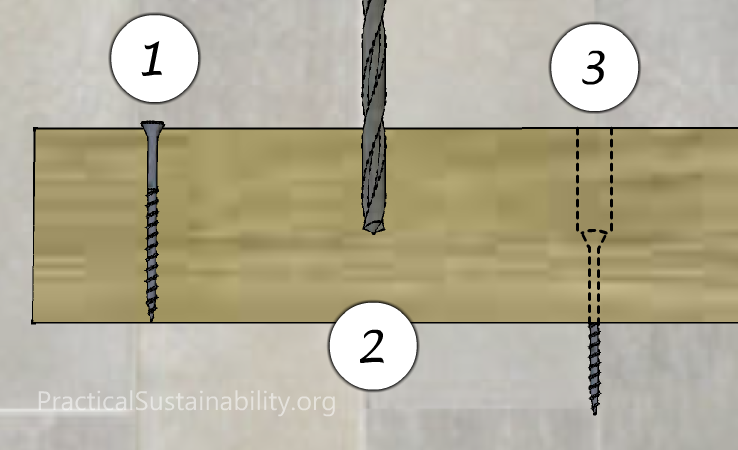
Large screws can be expensive, and it’s not really worth buying a huge box if you only need them for a few joints. Using this method can save you time and money. Make sure that when you oil or paint your timber you get some inside the screw hole shown in (3), or it will reduce the life-span of your project.

Pilot holes.

Use a drill bit that is equal to or smaller than the core of your screw. Pictured is the maximum width drill bit for that particular screw.

When screwing into thin or delicate timbers, it is always recommended that you first drill a pilot hole. Basically they make room for the core of the screw so that it doesn’t squeeze your timber apart as it goes in – which will prevent splitting. The screw thread is wider than the hole and still grips the timber properly.

Ad to help pay for servers:

COMING SOON! I’ll add the rest of these tips as required by new tutorials. – Chris 28/1/17

Measuring and cutting square ends.

Drilling various size holes into plastic with one drill bit.

Counter-sinking.

Blunt your nails to avoid splitting timber.

Disassembling pallets.

3 thoughts on “DIY basics tips”

  1. Pingback: $6 DIY Planter Box using recycled jugs and a pallet – Practical Sustainability . org
  2. Pingback: DIY Solar Oven prototype #1 – Practical Sustainability . org
  3. Pingback: D.I.Y Two level planter box tutorial, with free plans

Leave a Reply Cancel reply

Your email address will not be published. Required fields are marked *

Follow us on Facebook!

Follow us on Facebook!

Follow us on twitter

My Tweets

Search posts by Category:

Recent Posts

  • Practical Sustainability funding and growth news
  • Aquaponic Test System (2014 – 2017) Design Review
  • D.I.Y Two level planter box tutorial, with free plans
  • Aquaponic Nexus Tank planned prototype
  • Gravity Header Manifold prototype #3 tutorial

Subscribe to Blog via Email

Enter your email address to subscribe to this blog and receive notifications of new posts by email.

Join 13 other subscribers
©2023 Practical Sustainability | Powered by WordPress & Superb Themes