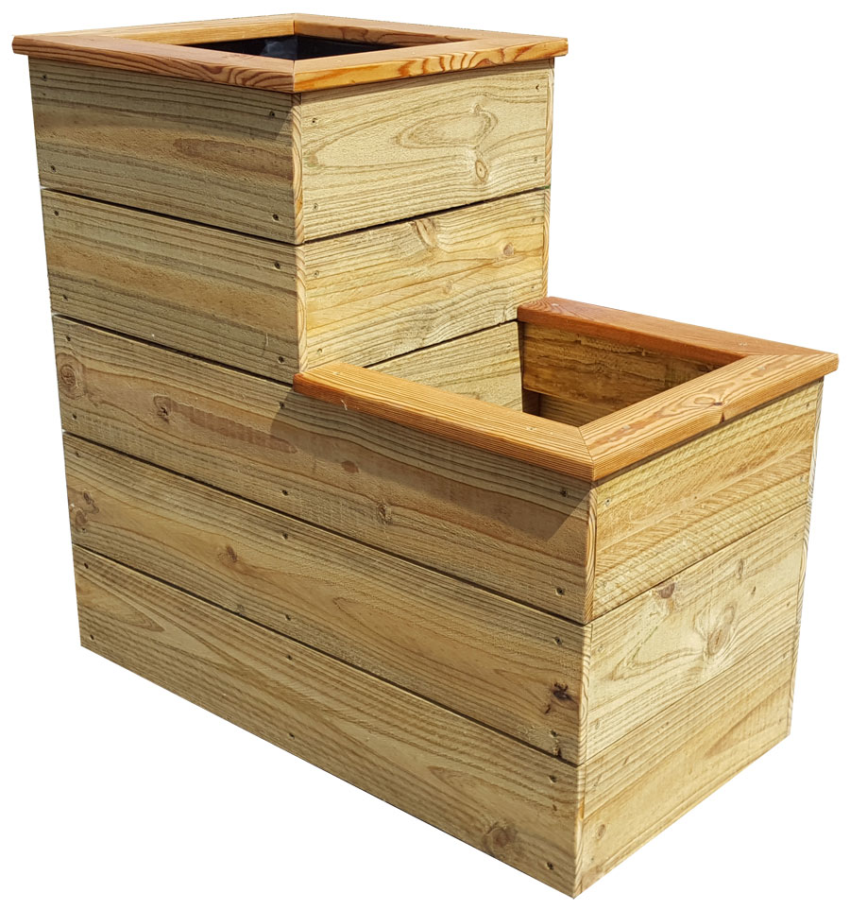
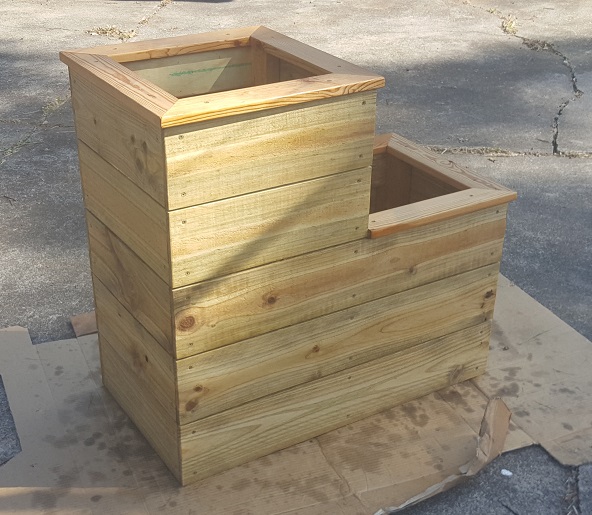
Hi there! This article will show you how to build a two level planter box, with a raised deck inside the upper level. Plans follow, plus tutorial info below. Modify these plans as needed – heights for each level of the box were chosen so that no palings had to be cut length-wise.
Materials Required
- 6.2m (20.3′) of outdoor treated framing timbers. I used 90x35mm (3.5’x1.37′)
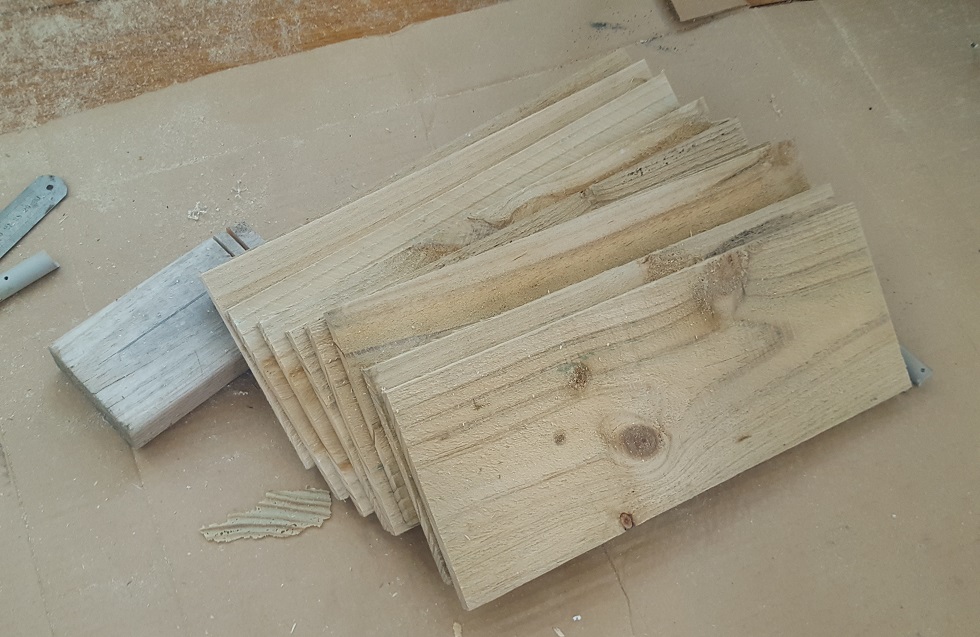
- 12.8m (42′) of 150x12mm (5.9″x 0.47″) cheap fence palings.
- 110 x 40mm (1.57″) Timber screws. Nails will work but screws are recommended.
- 20 x 55-75mm (2.2-3″) Screws to join your timber frame.
- Paint, stain or oil of your choice
Tools Required
- Measuring Tape
- Set Square
- Sliding drop saw (OR a hand saw + the ability to cut straight and square)
- Screw gun or drill
- Hammer and Chisel
- Drill bit smaller than diameter of your screws, for pilot holes
- Clamp (optional but recommended)
- Counter-Sink (optional but recommended)
Difficulty: Low – Medium
- Basic rebate joints and chiseling
- squaring frames CLICK HERE FOR TIPS ON SQUARING
- Medium – hard, if you are using a hand saw
Let’s get started!
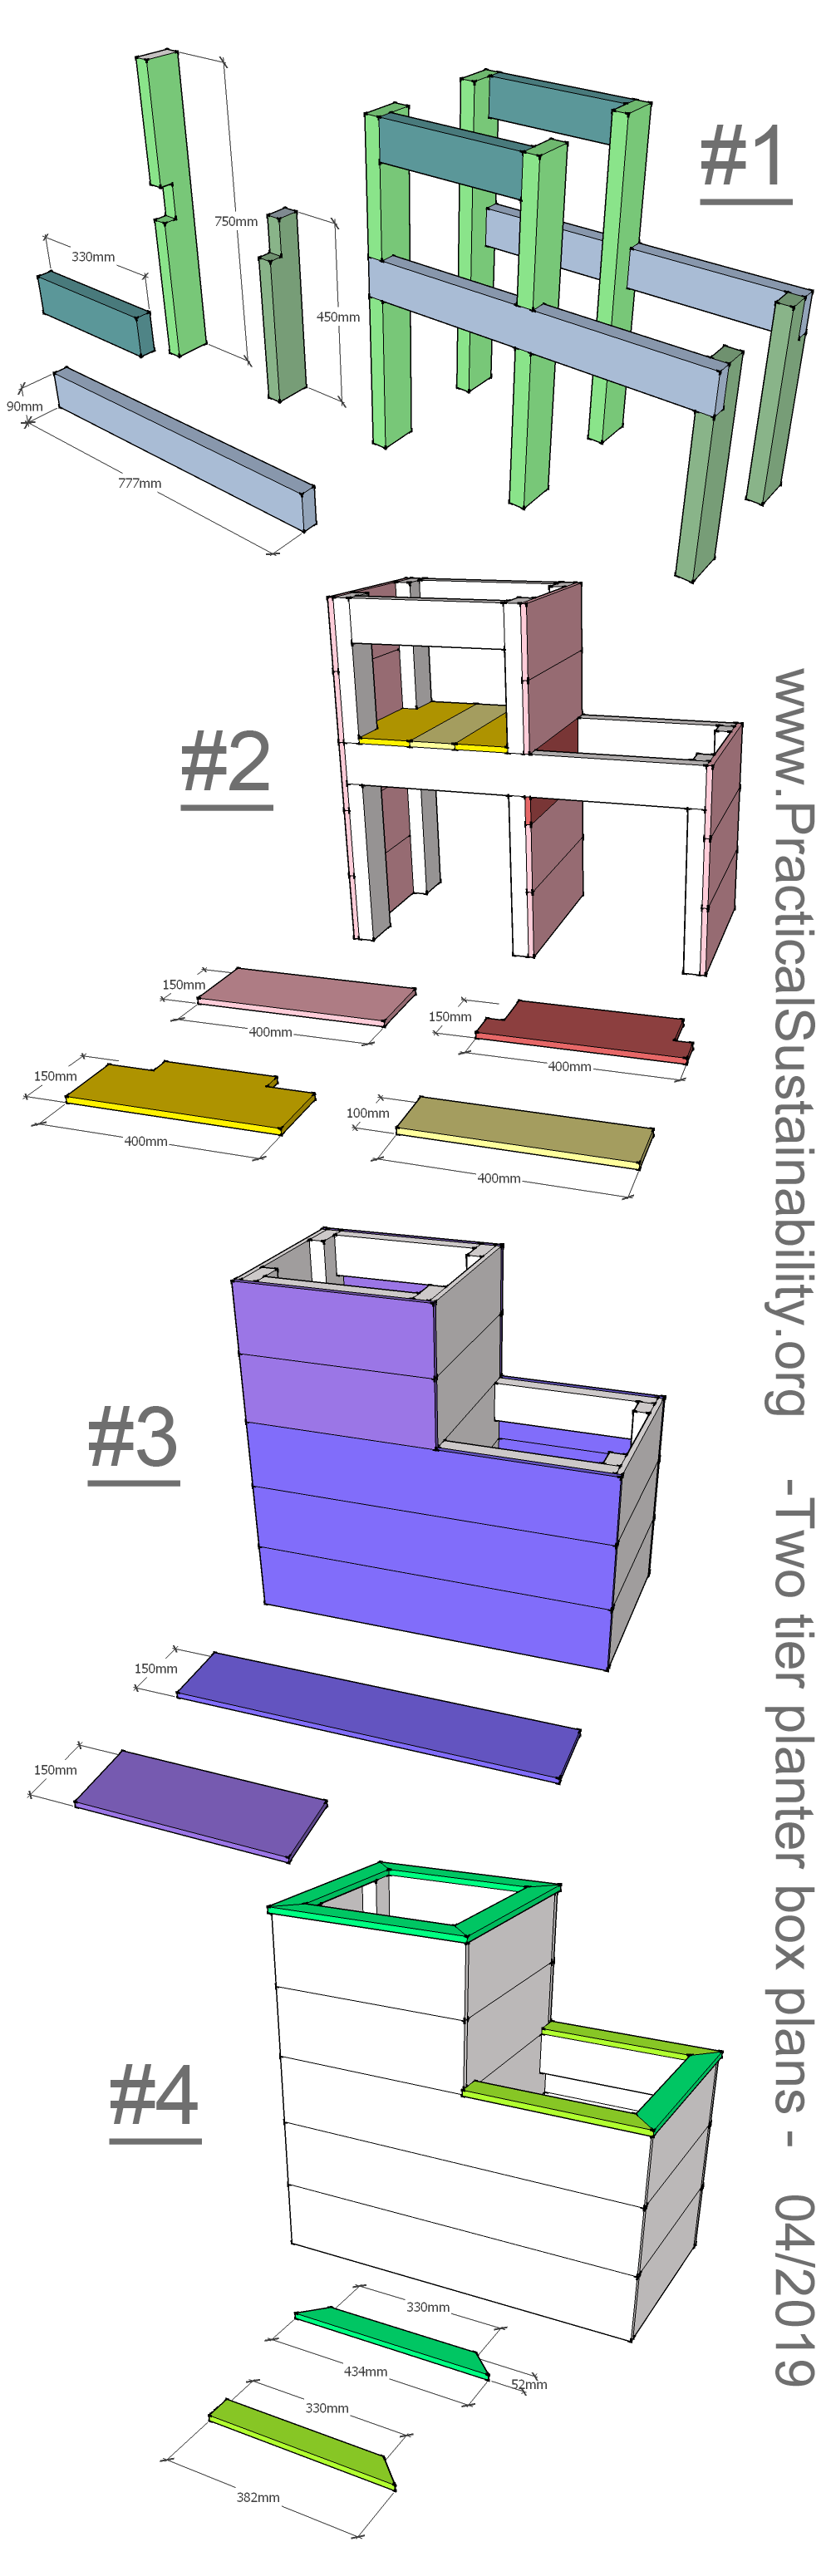
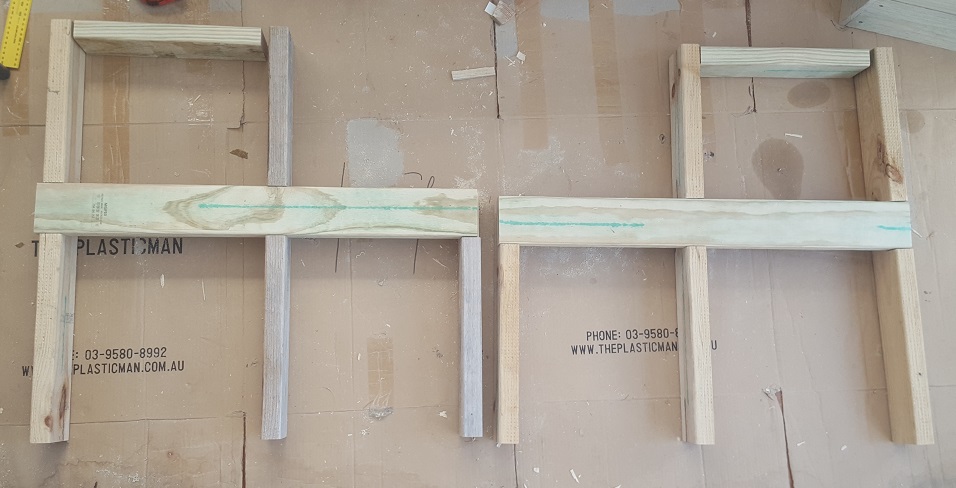
First, we will cut the 6 legs, and assemble the frame.
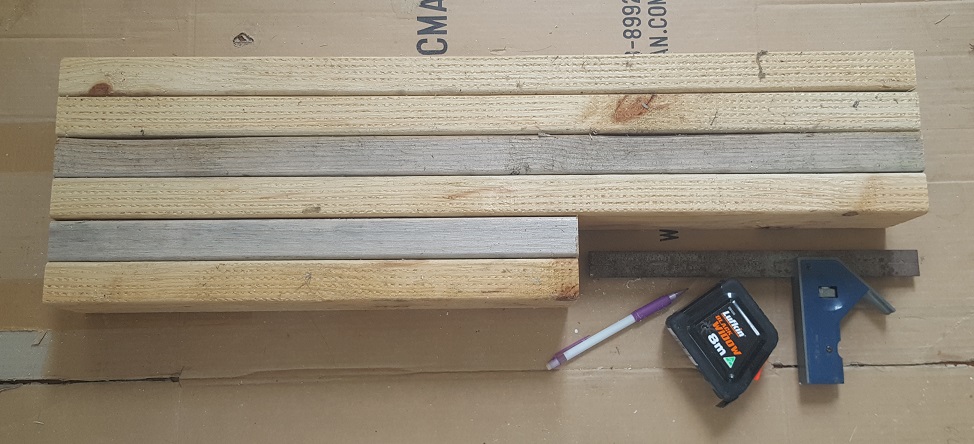
After aligning your legs perfectly – clamp them together to ensure they don’t move around during the next step. Use your set square against the ends of the leg stack to check it is perfect.
Next, we will mark and cut the rebate joint on all six legs.
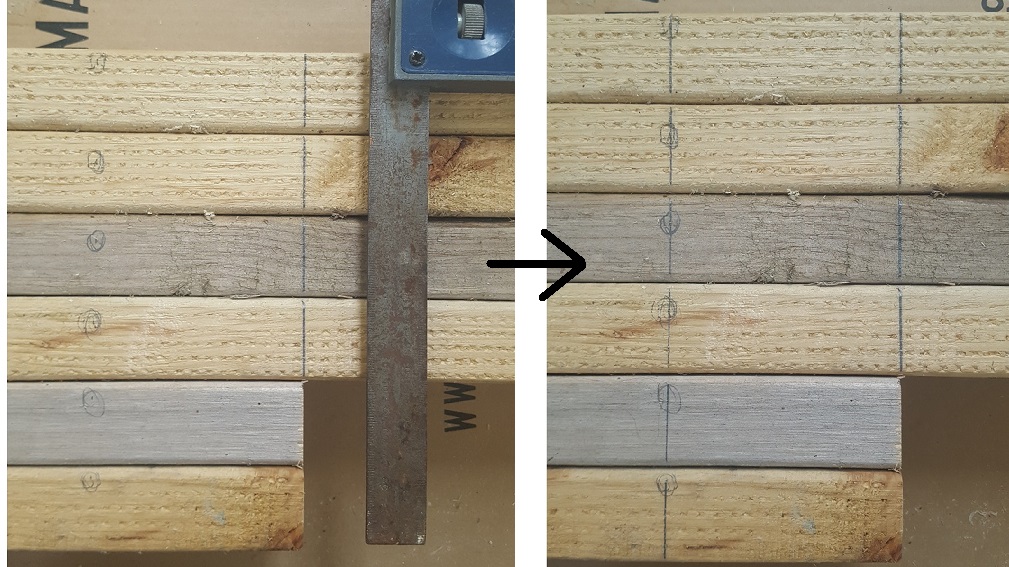
The width between your rebate joint lines should match the width of your frame timbers. In this case, it was 90mm. It is not necessary to measure on every leg – but I do this so that and tiny inaccuracy in measuring each point is averaged out to zero when marking the line using the square.
Next, we will set up our sliding drop saw cut depth.
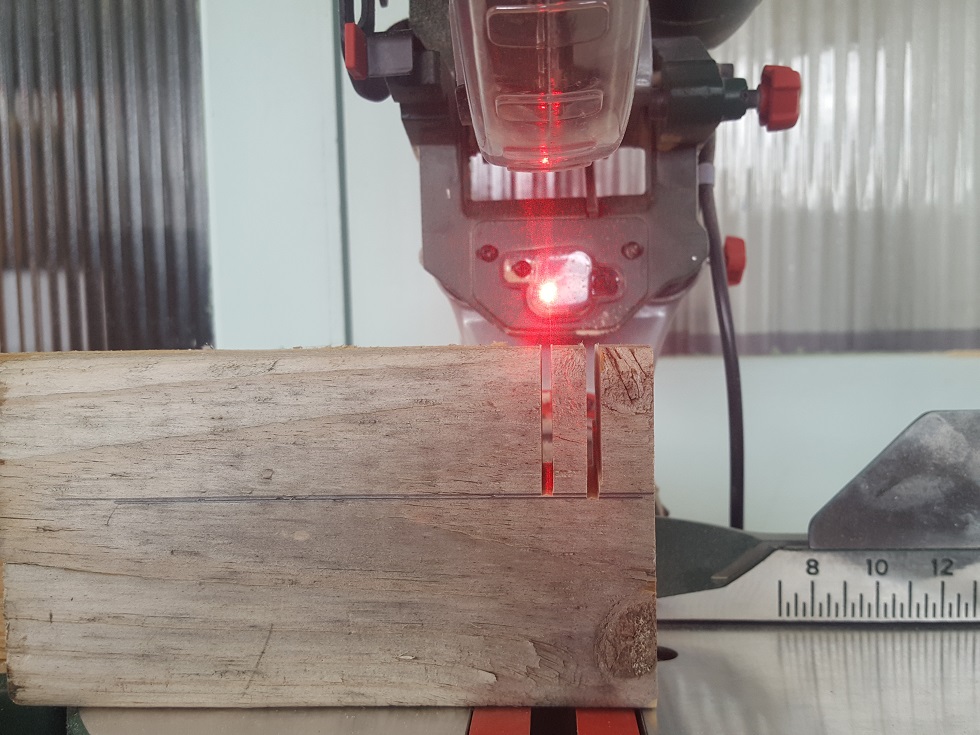
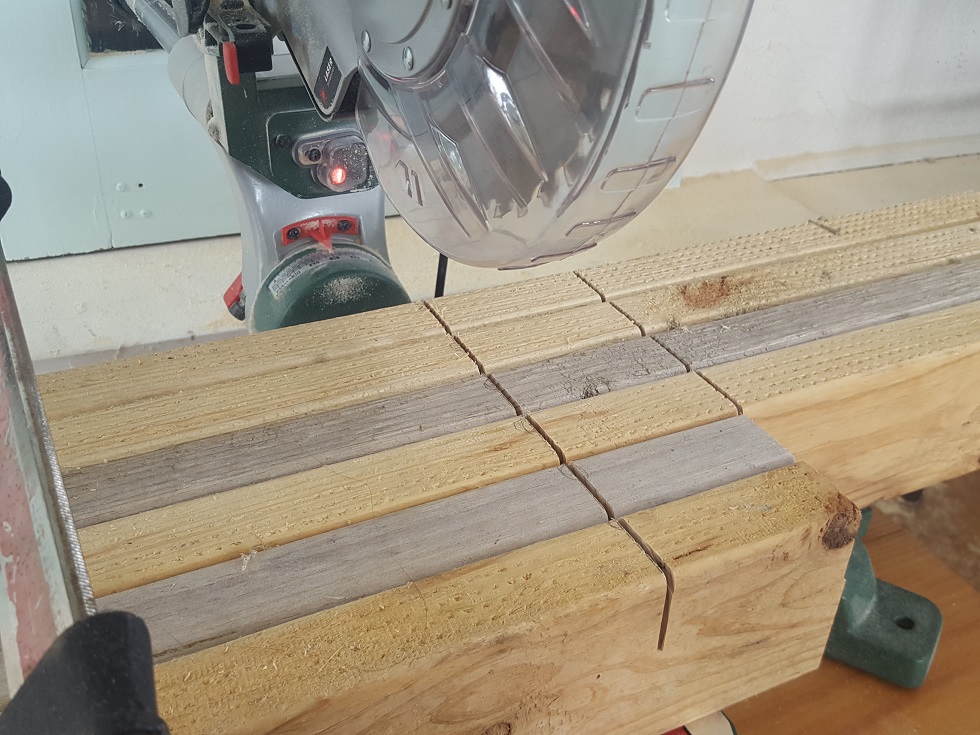
Now that your legs are marked and clamped, and your saw is set to the correct depth – it’s time to cut the rebate on all 6 legs simultaneously!
- Make sure to only cut INSIDE the lines. Saw blades have a thickness of their own, keep that in mind.
- If you are worried about accuracy – cut a few millimeters inside the line, and nudge your legs across slightly, then cut again – repeat until you reach the line accurately.
- NEVER start the saw while the blade is in contact with timber.
- Leave your clamp on while cutting and moving timber to avoid readjustments.
- If you don’t have much experience cutting rebates, cut a few more channels through the waste material between your lines. This will help keep the rebates the correct depth in the next step and make the chiseling a LOT easier.
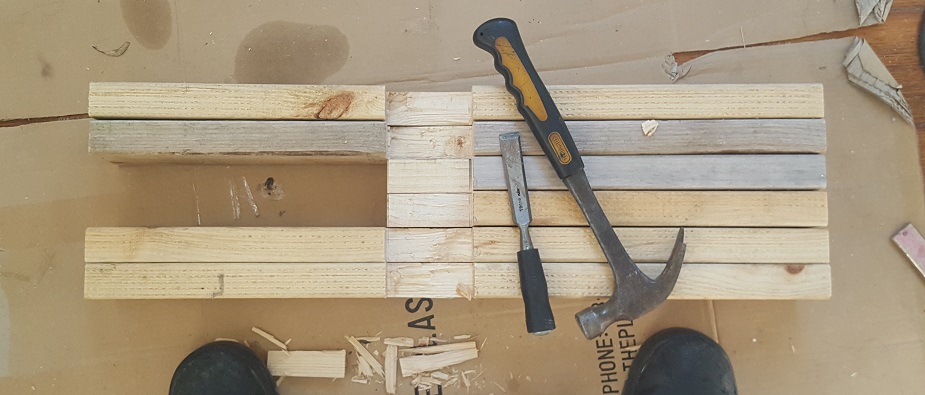
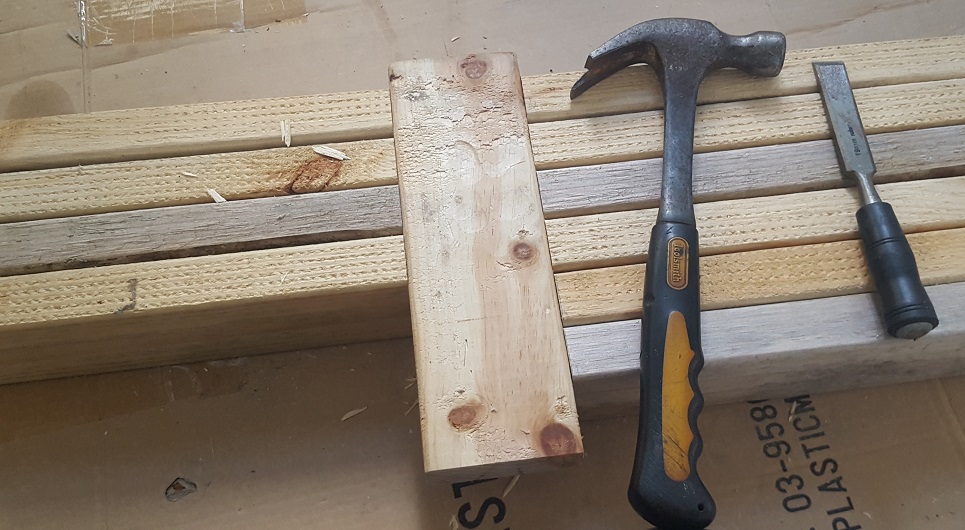
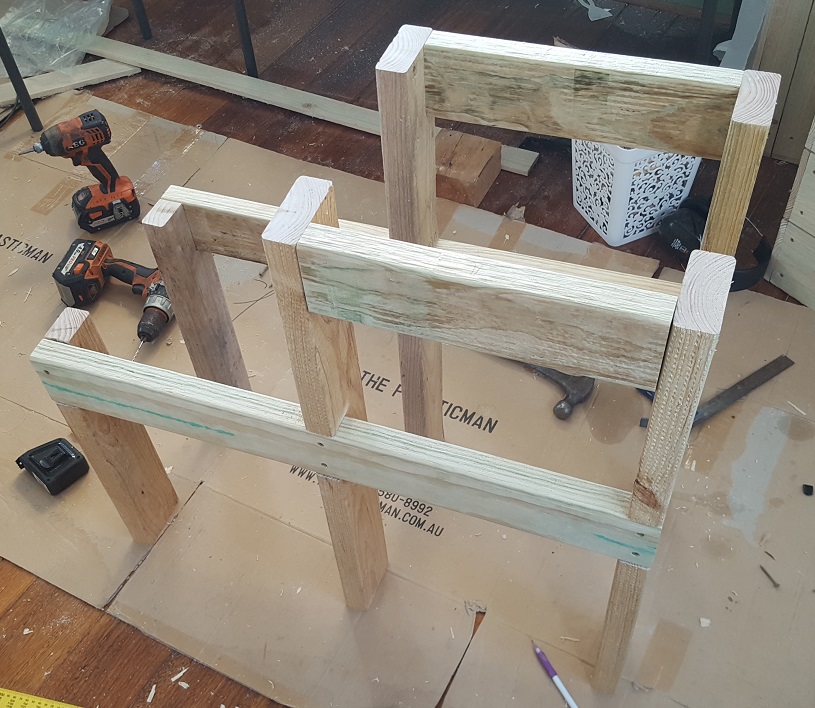
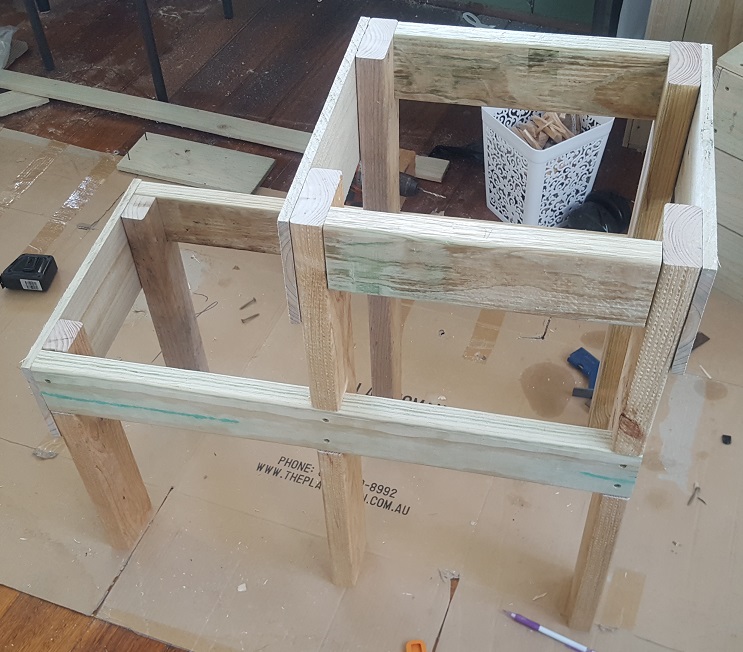
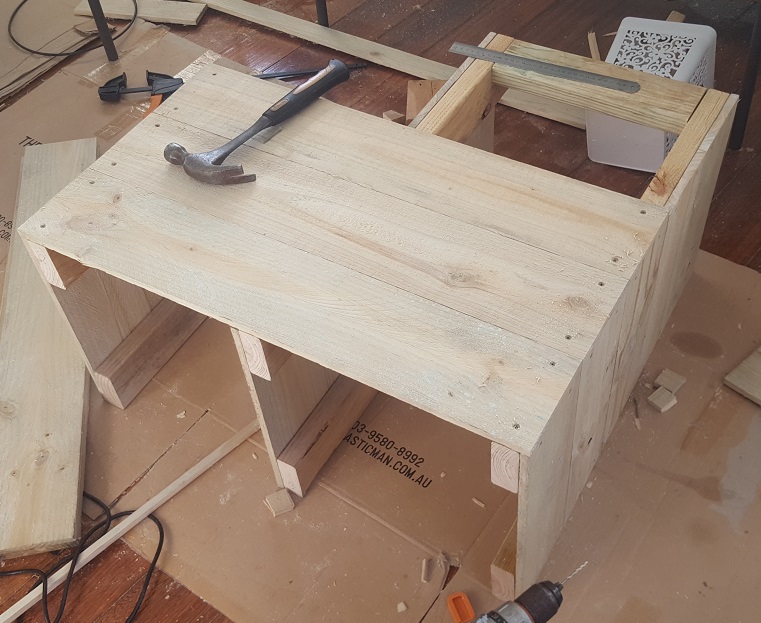
Now that the legs and rebate joints are cut, it’s time to assemble the rest of the frame.
Assembling the frame
First, cut your horizontal frame pieces. Ensure each matching pair is identical, any error will throw your planter box out of square.
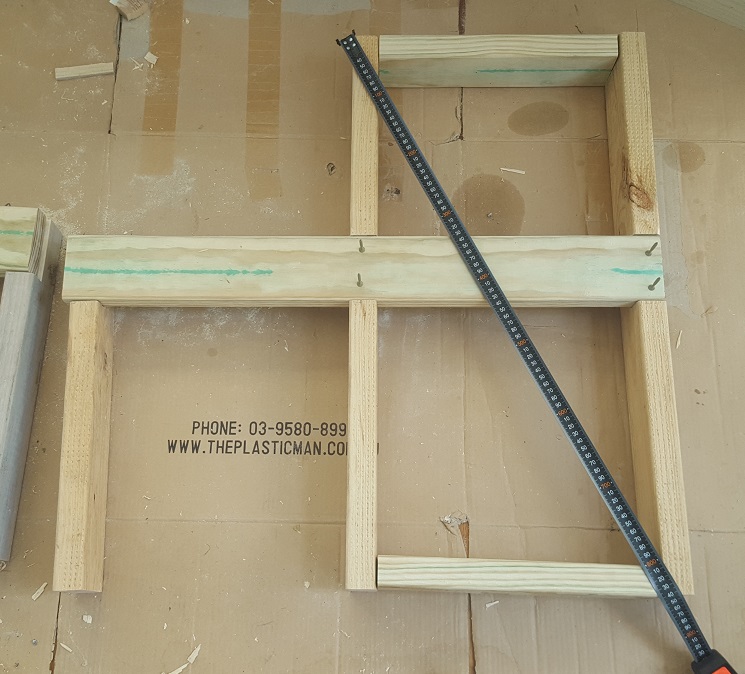
With the top frame pieces setting the spacing between your legs as shown, measure diagonally. Move your legs around until the diagonal measurement from top-left to bottom-right matches the measurement from top-right to bottom-left. When both diagonals match, your frame is squared up. Ignore the shorter leg on the left, for now.
- Once square and correctly spaced – put ONE screw on each join. Put some weight on the horizontal piece and then drill a pilot hole in each joint. Hole positions show in pic with screws.
- Drive a screw into each pilot hole.
- Recheck squareness with diagonal measurement in both directions.
- Put weight on the horizontal piece again, and drill the second pilot hole into each joint.
- Without removing weight from the horizontal piece, drive in the final two screws.
Your horizontal piece and two long legs are now locked into position.
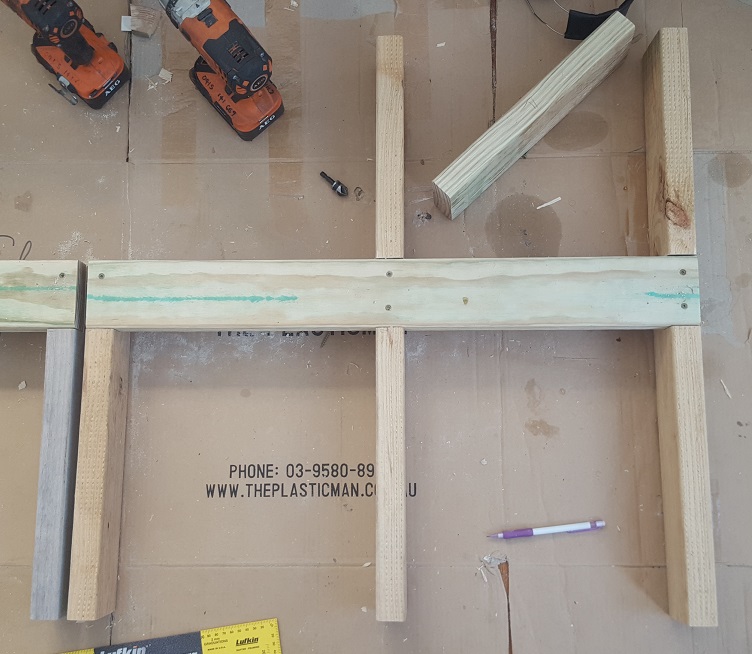
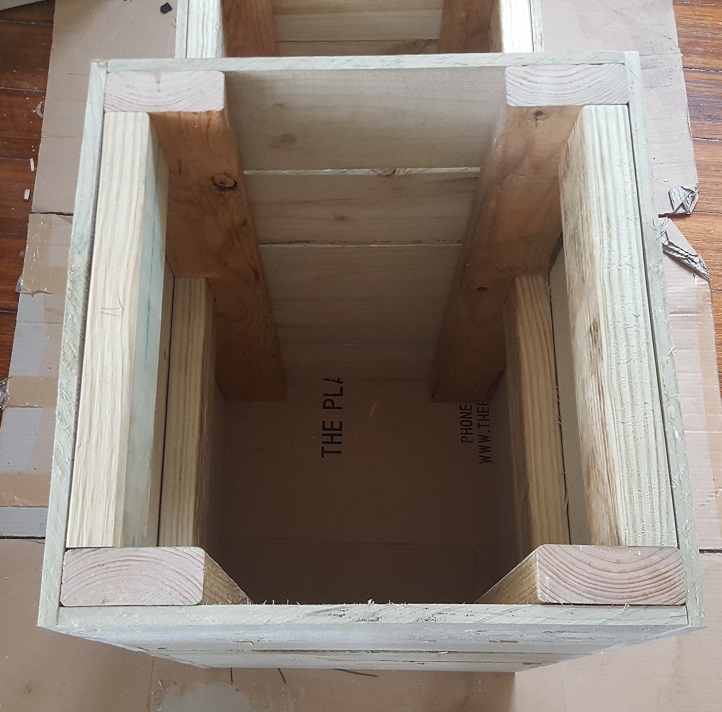
Once the top corner of the short leg is secured as shown in the above picture, measure to make sure the short leg is parallel to the middle leg.
Leave out the second screw in this joint for now. We will lock it into position later, while doing cladding. No box is perfect, and this will give us a few mm of tolerance level.
Lastly, attach the top horizontal short piece – use your square to make sure it sits flush with the legs, and attach with two screws through each leg – using pilot holes. Check the following picture for alignment.
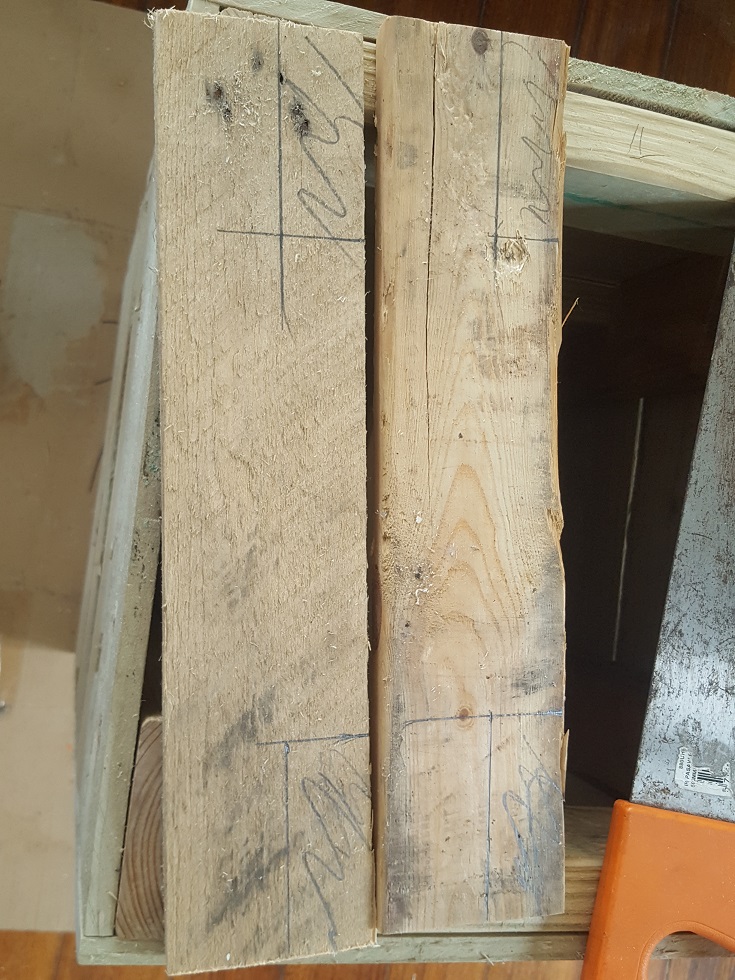
Time to make some templates.
We are going to make two templates for marking out where screws will go. Using templates, you can make sure your screw positions match on all cladding timbers, without measuring more than once.

You’ll need two templates
One template will be for all short 400mm palings, the other will be for every paling on the two long sides of the box.
- The template for the short 400mm pieces should have nails 15mm in from the long side, and 17.5mm in from the end (half the width of the edge of the frame timbers)
- The template for the longer side of the box should have nails 20mm in from the long edge (so they don’t collide with the screws coming in perpendicular at 15mm) and 28mm in from the ends (since these timbers hang 10mm past the frame)
- Drill pilot holes for your nails to make sure they are accurate.
Once your two templates are ready, you just align them with the ends of your timbers and tap each nail lightly to mark screw holes.
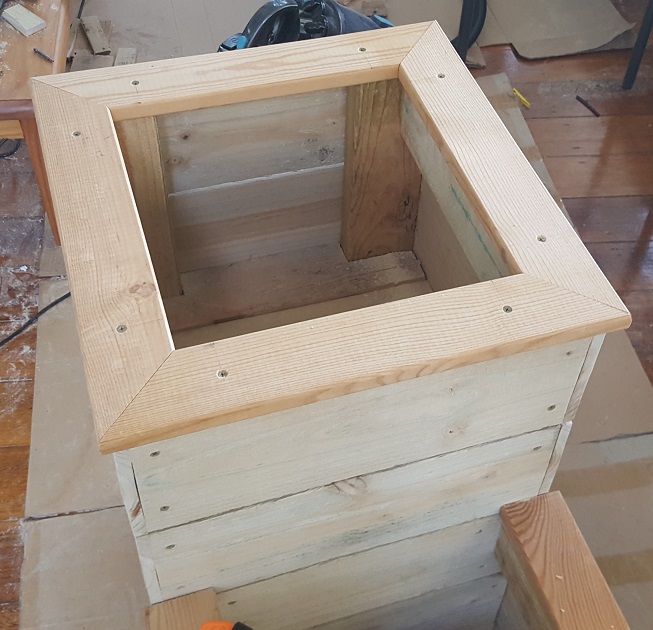
Let’s start cladding this beast!
All screws in the following steps are pilot-holed and counter-sunk.
First, set up your saw to cut at 400mm (15.748′) using the inbuilt jig. If your saw does not have a jig, clamp a piece of scrap timber to your bench 400mm from the saw blade. This will ensure your lengths are identical when cutting.
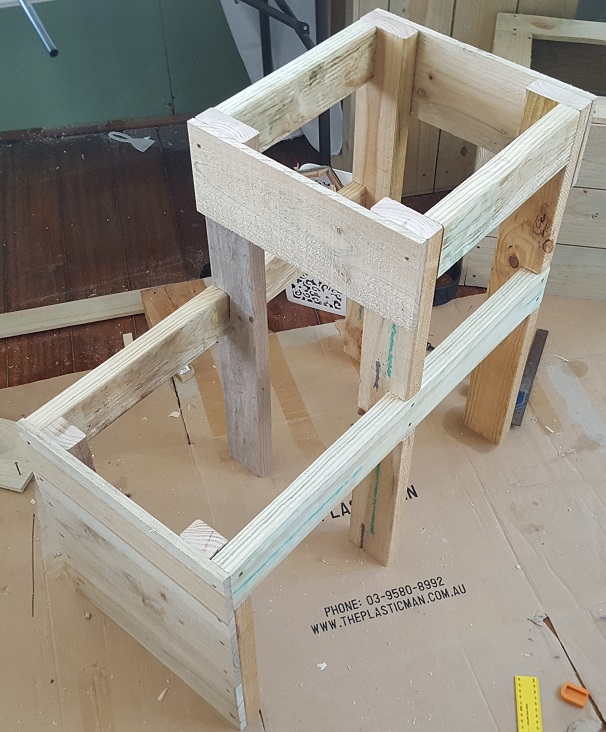

Notice in the above picture that the short leg side still only has one screw connecting the leg to the horizontal piece of the frame. This is so it can move slightly to make sure your timber fits perfectly in the next step.
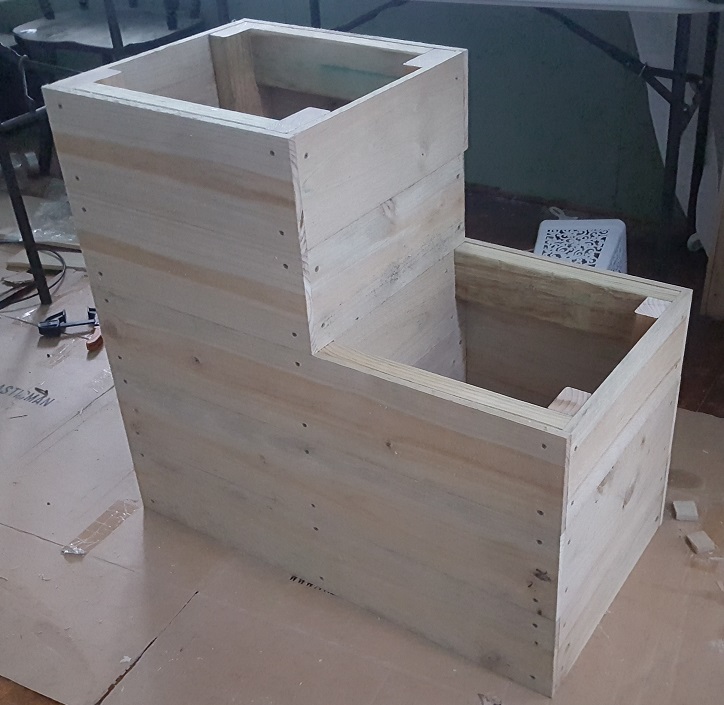
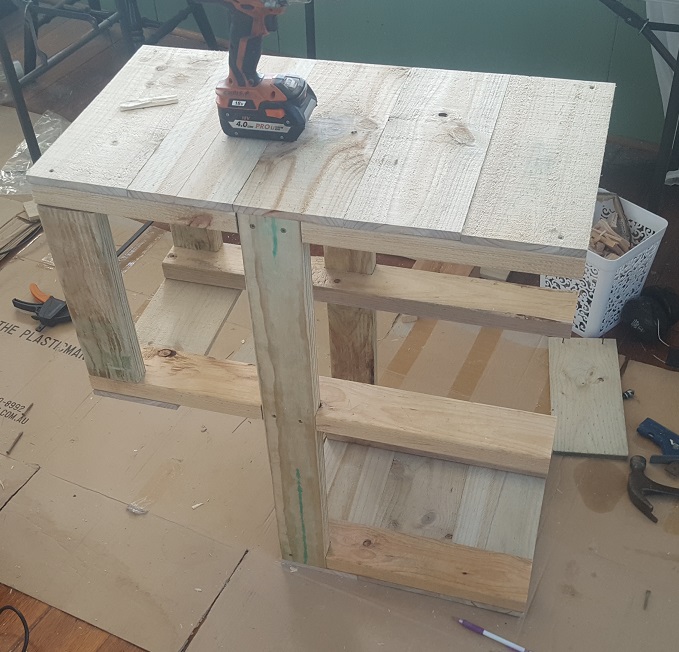
Installing a raised floor – optional
At this stage, you could stop here, line the insides with some plastic, and have a completed planter box. But, let’s forge ahead!
Mark out and cut spaces on two floor pieces as seen above, sized to fit around your frame legs. Accuracy does not matter here. Next, fill in the rest of the deck with more scrap timber off-cuts.
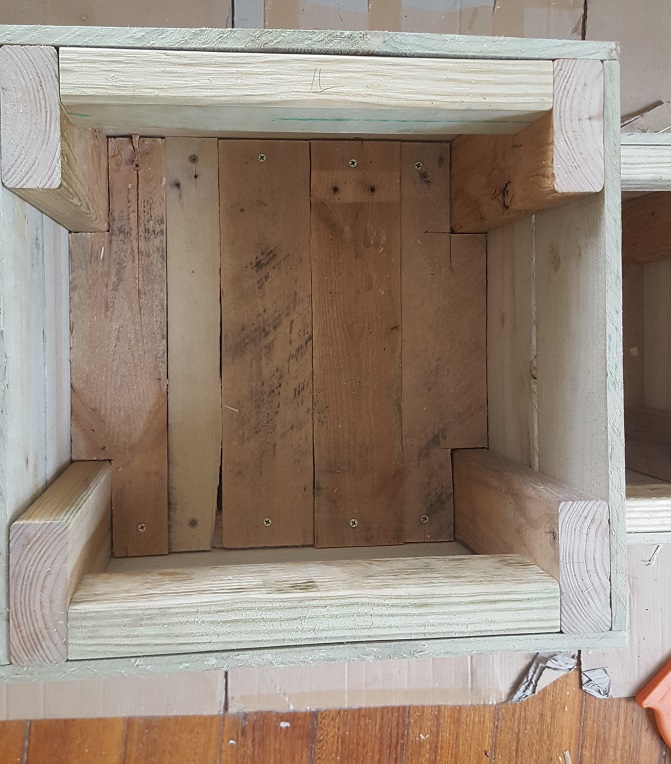
If you use timber fence palings like I did, or any other wet timber type – stop here and wait a week for your timber to dry out.
Finishing touches
Line your box with plastic
When exposed to moisture and soil, your planter box will begin to degrade within a few short years. Help prevent this process by lining any inside surface that will touch soil.
I used basic 200um(0.2mm) builders plastic. Cheaper 100um(0.1mm) sheets would also be acceptable, but the extra durability of the 200um is well worth the cost.

Measure the inside walls and floor of the area you want to line. Cut a single, unbroken piece of plastic. Once ready, place it over the mouth of the planter box, and push the center square (shown above) down into the floor of the box.
Fix the sides onto the box with a few staples, tacks, or small nails. You will be left with triangular flaps hanging out of the corners. (the grey areas shown above)
Stretch these triangles across an adjacent side, and put a single staple or tack. Once you box is filled with soil – the plastic will be held firmly in place. The staples or tacks are just temporary solutions.
All done!
Thanks for reading. Happy planter boxing.
Hopefully it all makes sense, this article was a little rushed. Comment or DM if you think any step needs clarification. Cheers!
-Chris