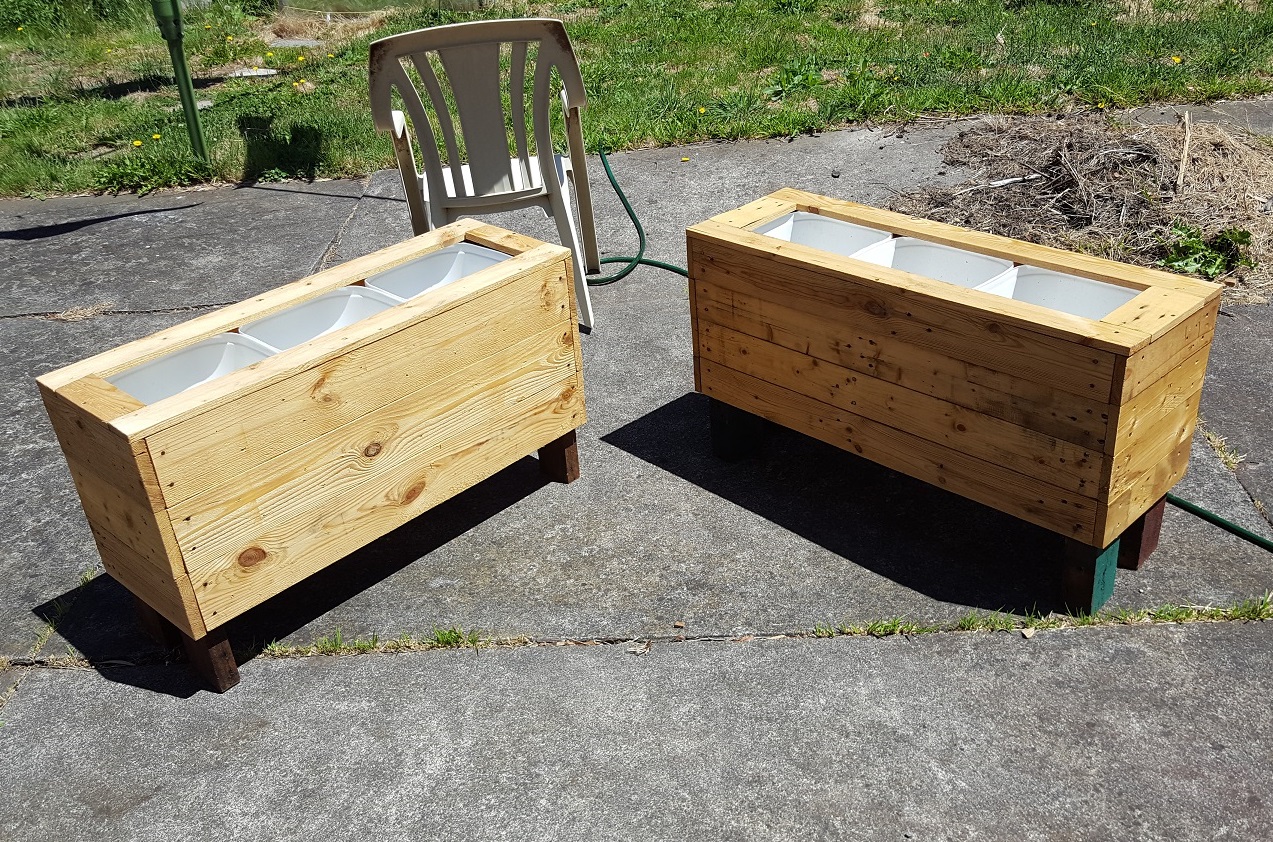
Welcome! Here’s what we’re trying to build, Youtube video of the results:
Not everyone has space to plant a traditional garden – or they may be renting and are not allowed to change the space they do have. Garden planter boxes are simple solutions to these problems. The only real cost will be filling them with soil, but if you know someone who composts their green waste, maybe you can trade them a planter box for two planter boxes worth of soil!
Materials required:
- 1 full size timber pallet (free, recycled)
- Nails (free, recycled from the pallet)
- Several jugs, buckets, or other containers (free, recycled)
- 20 screws minimum
- 2 cups of linseed oil (approx, depends on the timber)
Tools required:
- Hand saw
- Hammer
- Screw gun
- Measuring tape
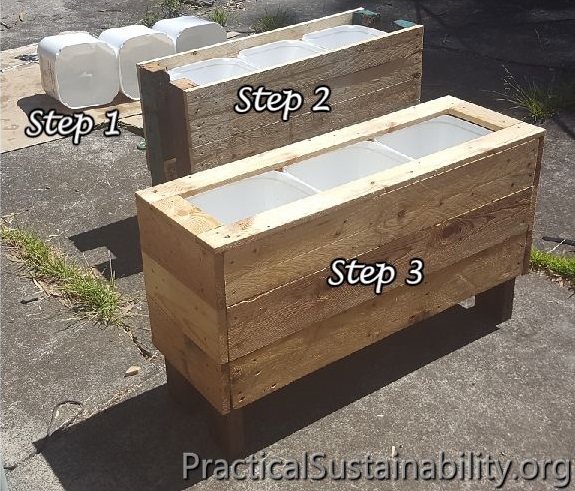
Time to get started! – Choose your containers
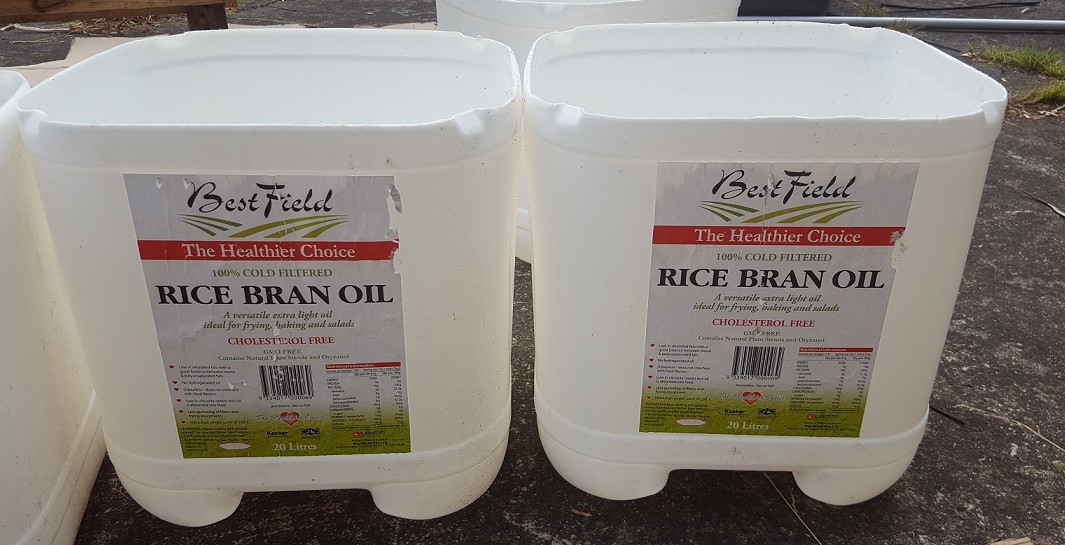
These are from a local shop that uses a deep fryer daily, it would be a shame to throw them away.
You could make this type of planter box without using plastic containers, but it will drastically reduce how long it lasts. The constantly moist soil will make it self-destruct.
Plan the frame.
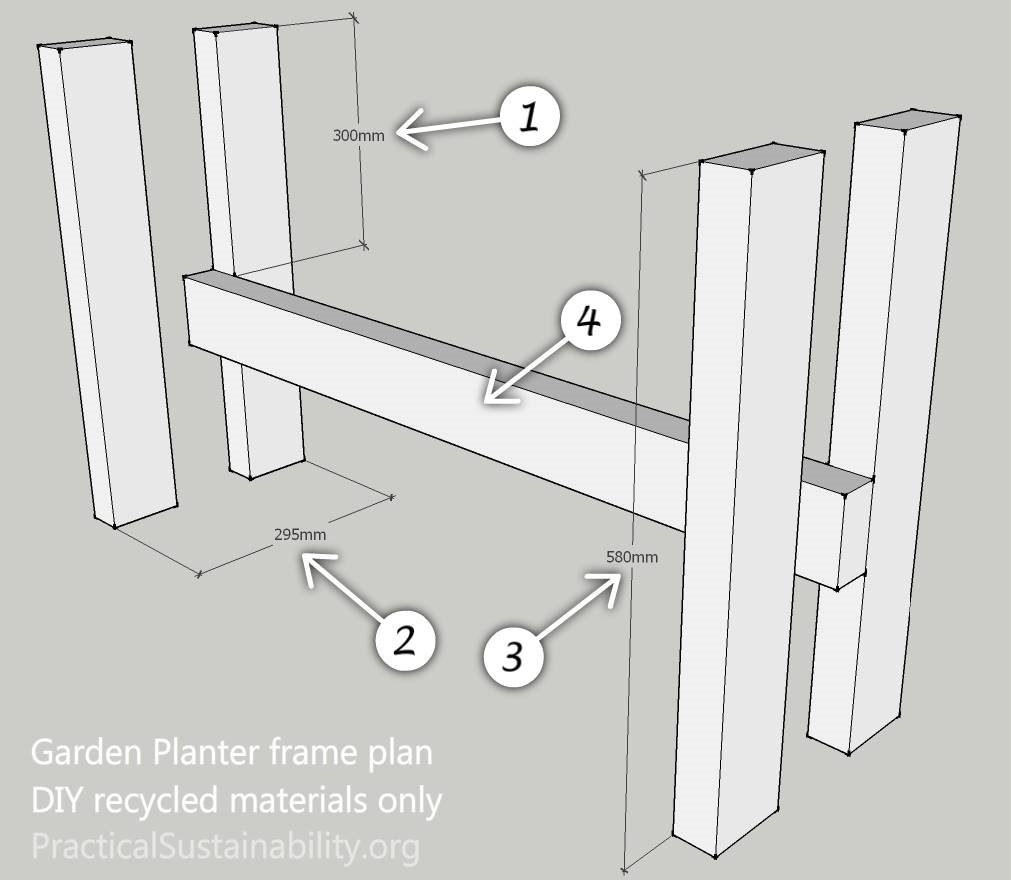

- This measurement is your jug/bucket height + 5mm + the thickness of the pieces you plan to use for (5).
- This is the width of your jugs/buckets.
- You can make your planter box whatever height you want – but if you plan to make it out of a single pallet it must be less than half the length of the pallet so you can get 4 legs from two pieces.
- The length of the horizontal cross piece will be the width of your containers combined, plus the overlap of the legs on either end.
- You’ll need at least two of these to help keep the frame square. I used 4 so that each of my three containers were fully supported, but it’s not entirely necessary.
Start building!
- First, connect your three frame pieces, using two screws per joint. Click Here for the quick tutorial on getting things square.
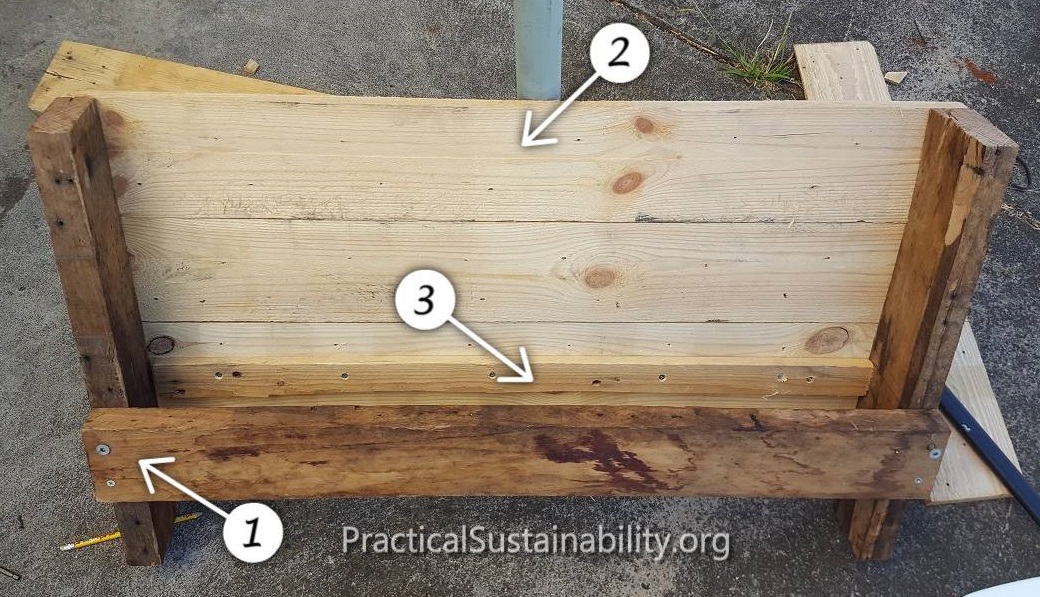
- Cut and attach your side pieces. Use enough to reach down past the horizontal part of your frame. I attached them using recycled nails from the pallet.
- Screw a strip of scrap timber to your side piece, level with the horizontal part of your frame. I cut down an otherwise useless piece that had splintered when taking apart a pallet.
Build the other side.
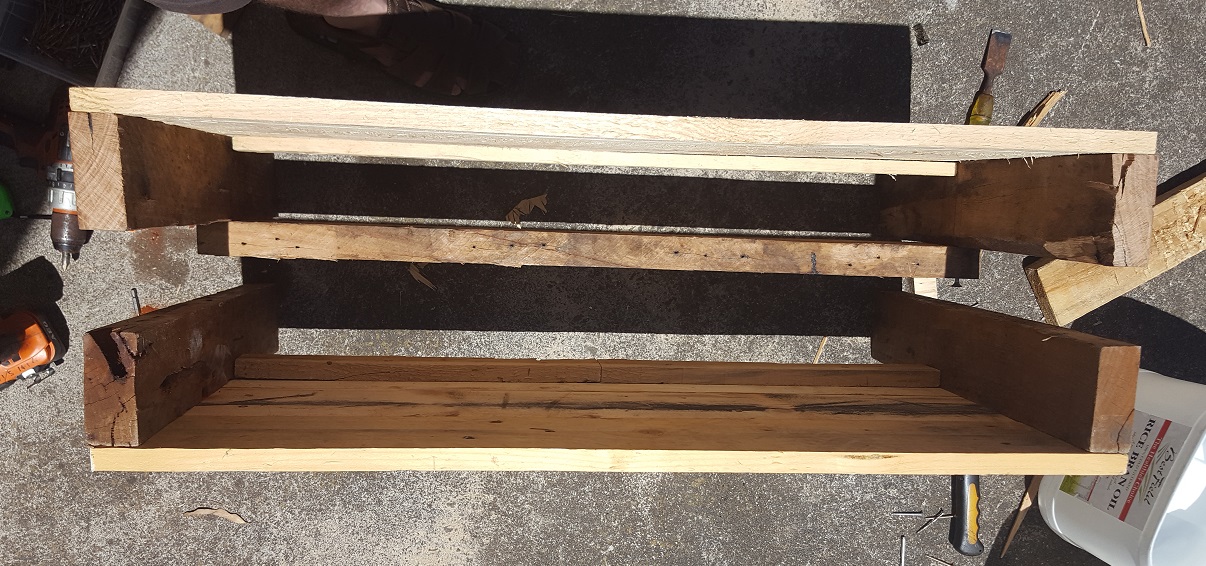
Connect your cross-bits.
Connect your two completed sides together.
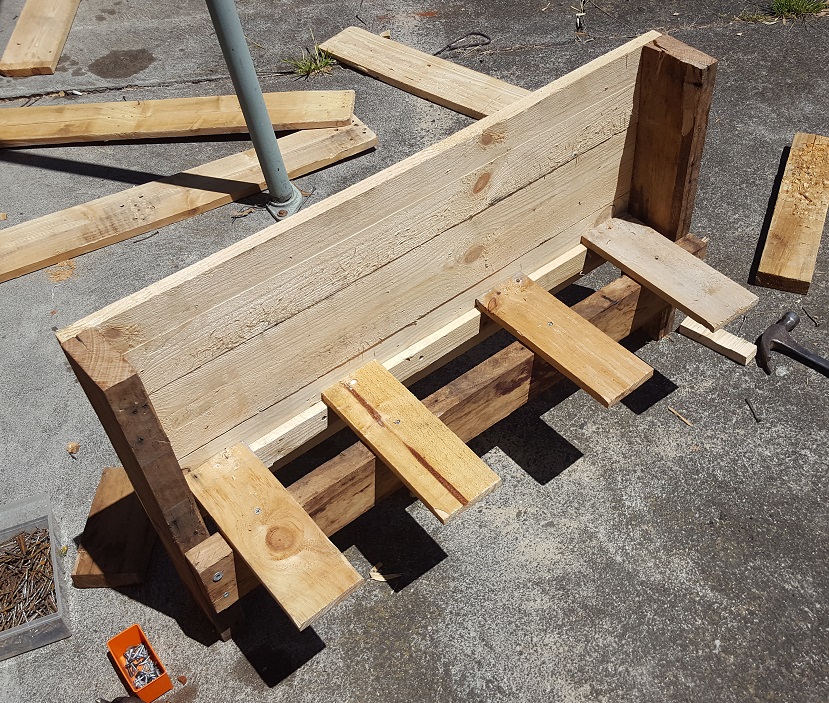
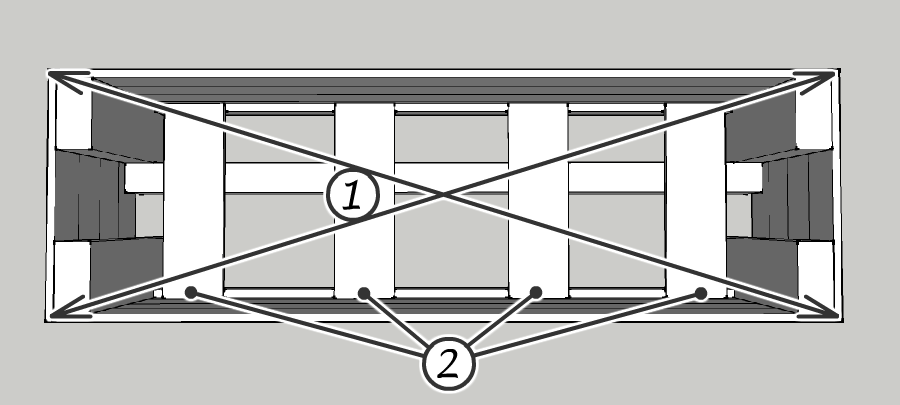
- Figure out your total width – Jug/bucket size + the thickness of your side planks. Cut 8 pieces for the side cladding, 4 on each end of the frame. (or however many you need to match your long sides)
- To keep your frame square, make sure your diagonals are equal (Click here to learn more). Attach your side cladding.
Tip: Attach your top piece first, with a single screw or nail into each leg. This will help you hold everything together while you get it square.
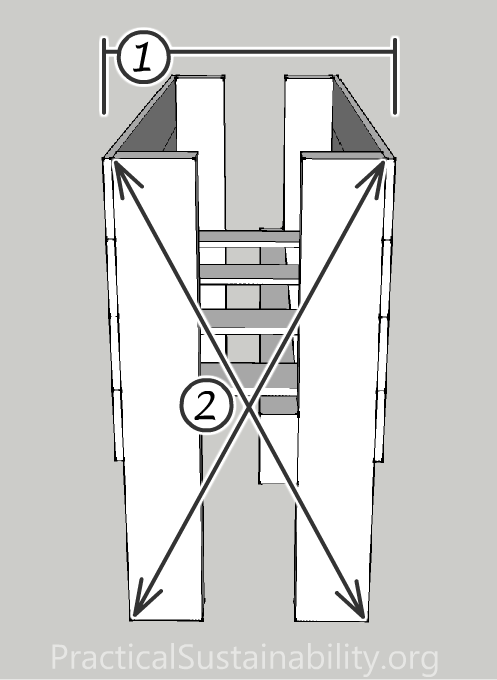
Square and secure the frame
- Match your diagonal distances to get the frame square. I was able to muscle it into position by hand. If you’re having trouble, get someone to help!
- Drill pilot holes (Click here for info) and screw your cross-pieces into the ledge on the side.
Whack on some paint or oil.
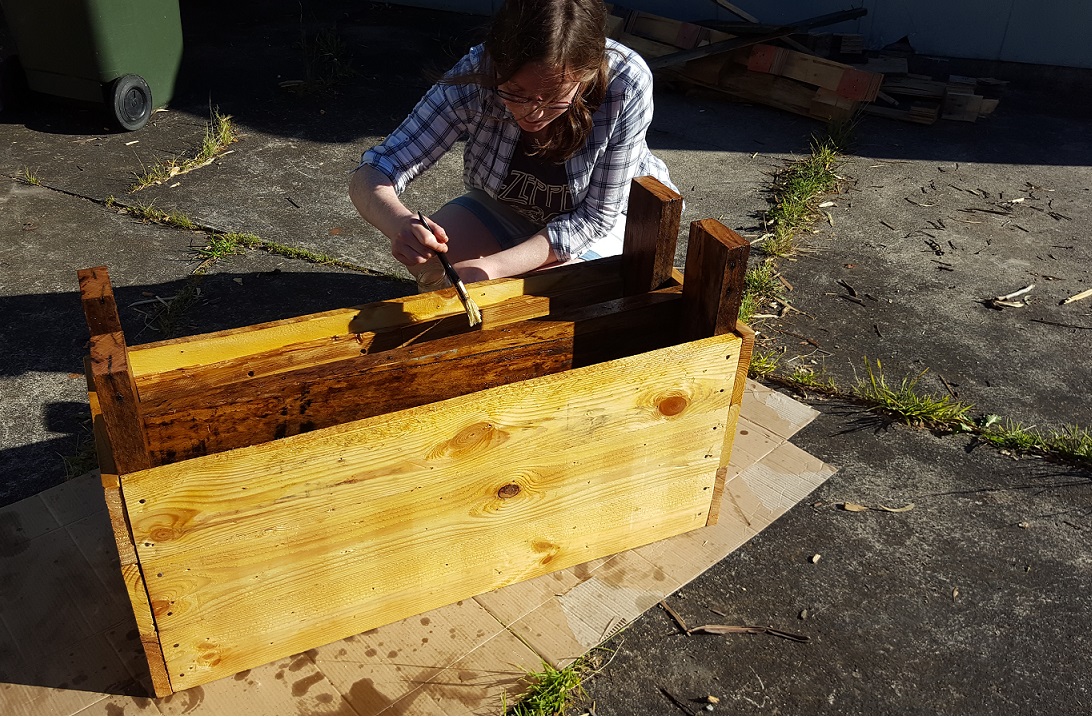
I used raw linseed oil – cheap, effective and relatively natural. Slop it on, paying attention to all cut ends, especially the bottom of the legs. A second coat is recommended, as it may extend the life of the planter box by several years.
Add some trim to the top (optional)
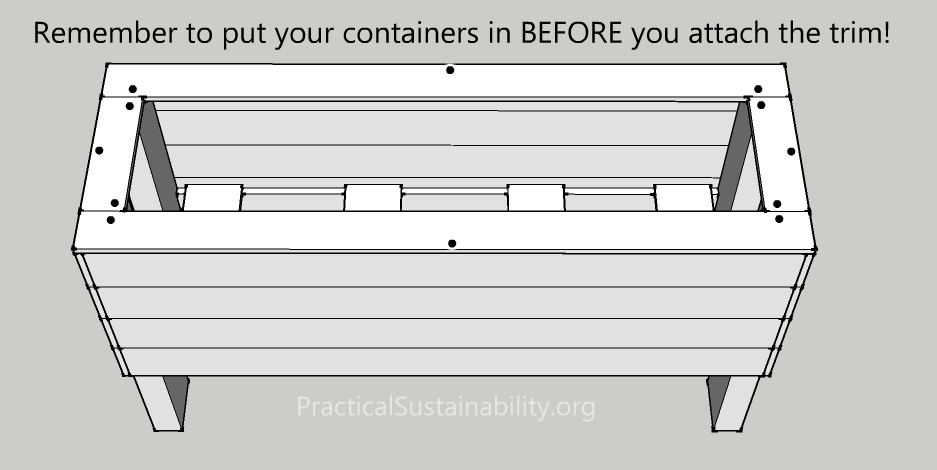
- Measure and cut the your 4 trim pieces.
- Oil them.
- Put your containers in!
- Drill a few drainage holes in each container, where the water will flow out onto the ground, not onto your cross supports.
- Screw or nail the trim to the frame at the positions shown in the pic above. Pilot holes are ESSENTIAL for the fixings into the horizontal slats, at N, S, E, W, on the above drawing. (Click here for pilot hole info)
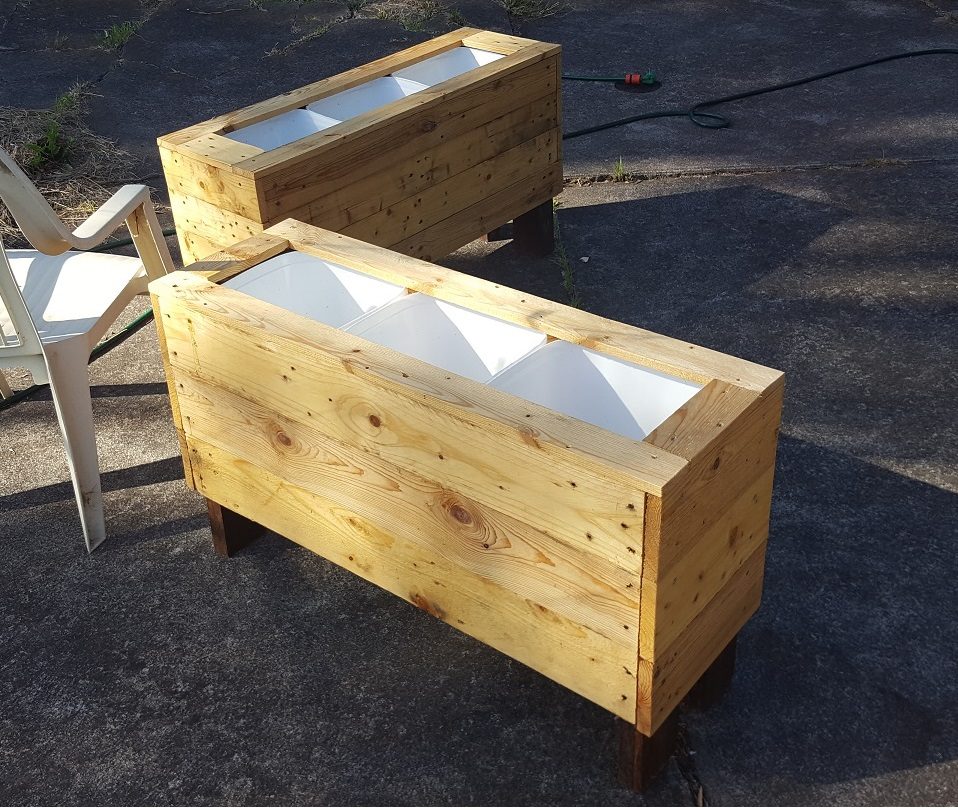
DONE!
Future garden planter projects include multi layer stepped designs and designs that involve simple drainage so they can be used indoors.
Follow us on Facebook to get involved! (Link below article)
-Chris
Did you drill any holes in the bottom of the buckets for drainage so that whatever you planted is sitting in moist soil not soggy, wet soil?
Article updated! Root rot is a killer
Should you drill holes in the bottom of the plastic containers? I’m curious about soil drainage and that kind of thing. Also, would plastic chemicals leach into the soil? (Like, would it be safe to eat vegetables from this sort of thing?)
Good point, I forgot people may not know about the drainage holes, article updated! And yes plastic is generally fine, especially if you get something that is food grade
Good stuff, Chris, they are great projects well explained…
Cheers Kai, it means a lot coming from a joinery master!
I was very happy to discover this site. I wanted to thank
you for your time just for this wonderful read!! I definitely really liked every part of it and I have you
saved as a favorite to see new things on your web site.
I saw a lot of website but I conceive this one has got something
extra in it.
If pipes were installed in the base of the plastic and the pipes raised to a certain height or possibly an adjustable height And if the base of the box was filled with small pebbles it would become a wicking bed
The great things about this type of jug is that there is already a ridge in the base! So you can simply drill your drainage holes on the ridge, fill with scoria or other rocks, and voila! Wicking
Hardwood home furniture possesses one thing quite natural concerning it.
There is this feeling of heat, of nature and also of luxury that can be be discovered in hardwood home furniture.
Hardwood is actually born coming from the planet.