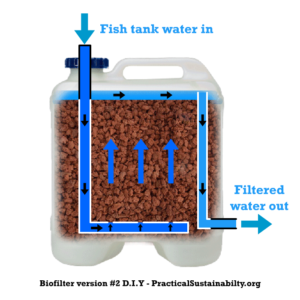
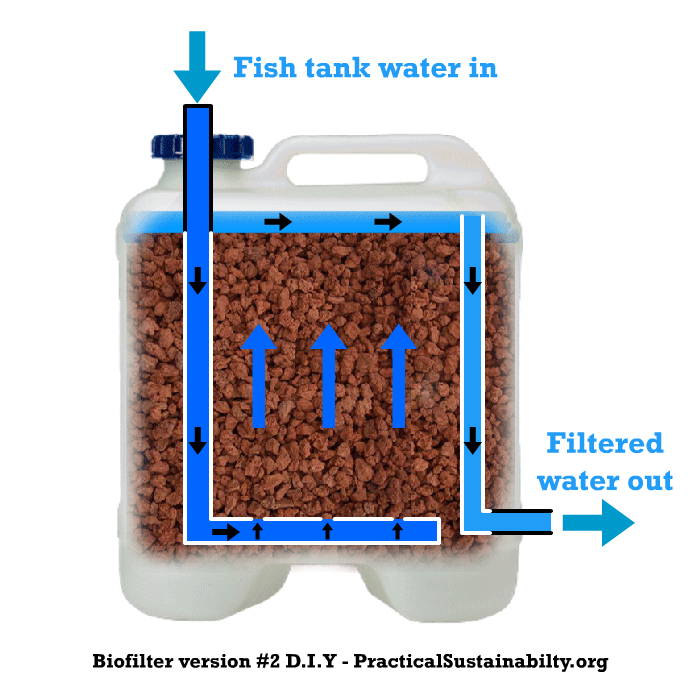
This article covers our ultra-simple Biofilter design, D.I.Y instructions, plus a little bit of science to help you understand what Biofilters do, and why you need one.
Biofilters are not essential for every Aquaponic system, as certain types of designs, or systems with a huge excess of grow media may not need them, even if they are beneficial. Don’t worry about that now, that’s a discussion for Aquaponics aficionados, although we will be undertaking more tests in the future.
If you’re running a small to medium sized Aquaponic system, you’re probably going to need a Biofilter.
What does a biofilter do?
There will be a whole article on what biofilters ASAP, but here’s a summary!
Biofilters are important for Aquaponics because they provide an environment for helpful bacteria to live. These bacteria are what convert Ammonia (from fish waste and other decaying matter) into Nitrites, then Nitrates, which your plants absorb as food.
The rocks are there to provide a lot of surface area where the bacteria can live, not to filter out particles and other waste.
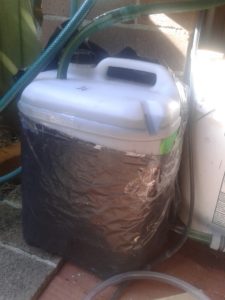
The most important thing is that these bacteria need oxygenated water to survive, so don’t feed this filter directly from a part of your system where some oxygen has already been used, such as from growbeds. We fed ours from the overflow of the main Header, which contained freshly oxygenated water straight from our main fish tank.

This design:
- Keeps the media wet at all times to help the essential biological elements thrive
- Low maintenance: We only ever gave it a smack when it seemed a bit slow
- Very low energy: ours was powered by overflow from the Header, no mechanics involved
- Very cheap
- Very long lasting
- Filters particles as well as sustaining the Nitrification process
- Cannot overflow from clogging – the input slows rather than the outflow, if clogged
- Must be fed aerated water.
- Recommended to cover or coat it to stop light getting in, if applicable


Do It Yourself!
Making the ‘Water in‘ bits:
Note: feeding this filter fast, or under high pressure, is not recommended for biological reasons.
- Cut a piece of PVC pipe so it will fit inside the bottom of your container. If you are using a square jug, cut it so it will fit diagonally so it covers the most area possible.
- Cut slots or drill holes in your pipe, small enough that your rocks can’t fit through. Try to spread them evenly along the whole length.
- Cap the pipe on both ends. It doesn’t matter if it will leak, and it doesn’t even have to be glued – the rocks will hold the caps on later. We just pushed bottle caps onto the ends of the pipe. If you have no caps that fit well, place them on the pipe, drill a hole through cap and pipe, and zip-tie.
- Cut a hole in the side of your pipe for your vertical hose or other water input pipe to fit in. Again, it doesn’t matter if it will leak as long as rocks can’t fit through. To make sure the hose doesn’t slip out, roughly drill a hole in the hose and the pipe, and zip-tie them together. OR you could use a 90 degree or T shaped pipe fitting if you want a PVC pipe leading upwards – it’s up to you. If the hole is in the center of your PVC pipe, you will get more even flow through your container, but it’s not essential.
- Place your PVC pipe at the bottom of the container, and poke the vertical piece out the top! Drilling a hole for it is optional, you can use the lid hole.
Making the ‘Water out‘ bits:
The goal of this is just to let water from the top of the filter drain back to your fish tank. There are a few options, eg; you could just cut a hole in the top and let it ‘waterfall’ out, or plumb a small pipe into the top of the container through the side. We used stand pipes that led from the top of the container down to the bottom, then out.
If your’re using a large plastic jug, they often have a hole near the bottom for a tap to be installed, which makes this a lot easier. It may be hard to reach inside the jug to connect things, so we cut a hand-sized hole in the top for access, which also makes it easier to fill with rocks.

- Unscrew the plug or the tap from this hole, and drill through it so you can fit a pipe through.
- Cut a short section of pipe, fit it through your tap/plug, and seal it in with silicone.
- Screw the tap/plug+pipe back into the hole.
- Attach a vertical pipe with a 90 degree elbow to the inside of the new fitting.
- Fill with rocks, done!
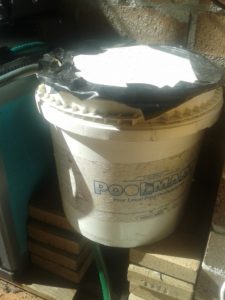
If you’re using a bucket, or other container, you’ll need to plumb a pipe through the bottom. Check out out Low Pressure Plumbing tutorial. (coming soon)
Comment if you’ve got a question or something to say! All comments will be read. We’ll hopefully have the time and money to try a few types of bio filter, so we can get some real empirical data for comparison of how effective they really are. Ours seemed exceptionally effective, but we had prototype gravity growbeds that have never existed before, so it is possible they were taking a lot of nitrification load off the biofilters. More science required!
Enjoy!


I have a Zeolite mine near us and I can access large volumes of various sizes quite easily. I am planning to try some in my growbeds.
Would it work in the biofilter?
Information on this product is on their website at
http://www.cmzeolites.com.au/index
I think you’d have to ask them – as far as I know, Zeolite can sometimes be alkaline or alkali and contain metals.
They might have had their zeolite tested and know exactly what’s in it!